Embroider Your Jeans: A Stitch-by-Stitch Guide to Personalized Denim
Denim is a wardrobe staple, a symbol of durability and timeless style. But sometimes, even your favorite pair of jeans can feel a little… ordinary. What if you could transform that everyday essential into a unique piece of wearable art, a reflection of your personality and creativity? That’s where the magic of embroidery comes in. Embroidering your jeans isn’t just a craft; it’s a powerful act of customization, breathing new life into denim and turning it into a canvas for self-expression. Whether you’re looking to cover a small stain, add a subtle accent, or create a bold, statement-making design, embroidery offers endless possibilities. It connects us to centuries-old traditions of embellishment while allowing for thoroughly modern, personal flair.
For many, the idea of embroidering jeans might seem daunting. Denim is thick, tough, and often stretchy. But with the right approach, techniques, and a little patience, anyone can successfully add beautiful embroidery to their denim garments. This comprehensive guide will walk you through everything you need to know, from gathering supplies and choosing designs to mastering stitching techniques and caring for your embroidered masterpiece. Forget fast fashion trends; this is about creating something uniquely yours, one stitch at a time.
Why Embroider Your Jeans? Beyond Just Aesthetics
Embroidering jeans goes far beyond simply making them look pretty (though that’s certainly a wonderful benefit!). There are several compelling reasons to pick up a needle and thread:
- Uniqueness & Self-Expression: In a world saturated with mass-produced clothing, embroidery allows you to stand out. Your design choices – the motifs, colors, placement – tell a story about who you are. It’s a direct way to inject your personality into your wardrobe.
- Reviving Old Favorites: Got a beloved pair of jeans with a small hole, a stubborn stain, or just feeling a bit tired? Embroidery is a fantastic way to mend, cover imperfections, and revitalize them, giving them a whole new lease on life instead of consigning them to the back of the closet or landfill.
- Sustainable Fashion Practice: By customizing and repairing existing jeans, you’re actively participating in slow fashion. You extend the garment’s lifespan, reduce waste, and move away from the cycle of constant consumption. Embroidering what you already own is a creative and eco-conscious choice.
- Mindful Creativity & Skill Building: The process of embroidery is inherently mindful. It requires focus and patience, offering a respite from the digital noise and a chance to engage in a tactile, rewarding activity. You also develop valuable hand-sewing skills and artistic confidence.
- Sentimental Value: Embroidering a pair of jeans can imbue them with deep personal meaning. They might commemorate a special event, feature symbols important to you, or become a cherished handmade item you’ll treasure for years.
Whether driven by creativity, sustainability, or the desire for something truly one-of-a-kind, embroidering your jeans is a fulfilling endeavor with tangible and intangible rewards.
Gathering Your Embroidery Arsenal: Tools and Materials
Before you dive into stitching, you need the right tools for the job. Working with denim requires some specific considerations compared to embroidering finer fabrics. Here’s your essential toolkit:
The Foundation: Jeans
Choose the pair you want to transform. Consider the fabric weight (heavier denim is sturdier but harder to needle), stretch content (less stretch is generally easier for beginners), and the area you want to embroider (pockets, hems, knees, thighs, belt loops). Ensure the jeans are clean and pressed flat.
Needles: Piercing the Denim
- Sharps: These are general-purpose needles with a sharp point, good for most embroidery on denim. Choose sizes appropriate for your thread thickness (e.g., size 7 or 8 for standard embroidery floss).
- Crewel Needles: Similar to sharps but have a slightly longer eye, making threading thicker threads or multiple strands easier. Also suitable for denim.
- Heavy-Duty/Denim Needles: Specifically designed for tough fabrics like denim. They have a sharp point and a stronger shaft to prevent bending or breaking. Highly recommended, especially for thicker denim or dense stitching areas.
Avoid overly thin needles as they can bend or snap easily in denim.
Threads: Adding Color and Texture
- Embroidery Floss (Cotton): The most popular choice. It’s affordable, comes in a vast array of colors, can be separated into strands for varying thickness, and is generally colorfast. DMC or Anchor are reliable brands.
- Pearl Cotton (Perle Cotton): A non-divisible, twisted thread that gives a lovely sheen and texture. Available in different weights (e.g., size 5 is common for surface embroidery). Creates bold lines.
- Fabric Paints & Markers: Useful for sketching your design directly onto the denim before stitching. Choose water-soluble or air-soluble pens specifically designed for fabric that will disappear (either with water or over time). Test on a hidden seam first!
Hoops: Keeping Fabric Taut
A sturdy embroidery hoop is essential. It keeps the fabric stretched tight, making stitching easier, more precise, and preventing puckering. For jeans, you’ll likely need a hoop of at least 6 inches in diameter, and potentially larger depending on your design area. Wooden or plastic hoops both work; ensure the inner hoop fits snugly and the screw mechanism tightens well. You might need to reposition the hoop frequently for larger designs.
Other Essential Notions
- Sharp Scissors: Small, sharp embroidery scissors for snipping thread close to the fabric.
- Thimble: Protects your finger when pushing the needle through thick denim seams or multiple layers. Choose one that fits comfortably.
- Needle Threader: Can be very helpful, especially if you have difficulty threading needles or are using multiple strands.
- Pins or Clips: To temporarily hold any patches or appliqués in place before stitching.
Having these tools organized and ready will make your embroidery journey on denim much smoother and more enjoyable.
From Inspiration to Design: Planning Your Denim Masterpiece
The design phase is where your creativity truly shines. Don’t rush this part; thoughtful planning leads to a more satisfying result.
Finding Inspiration
Look everywhere! Nature (flowers, leaves, animals), geometric patterns, folk art motifs, typography, personal symbols, abstract shapes, pop culture references – the possibilities are endless. Browse Pinterest, Instagram (#embroideredjeans, #denimembroidery), art books, or even vintage textiles for ideas. Consider the existing features of your jeans – could you enhance pocket designs, follow seam lines, or frame a frayed hem?
Choosing Placement
Where you stitch dramatically impacts the look. Popular spots include:
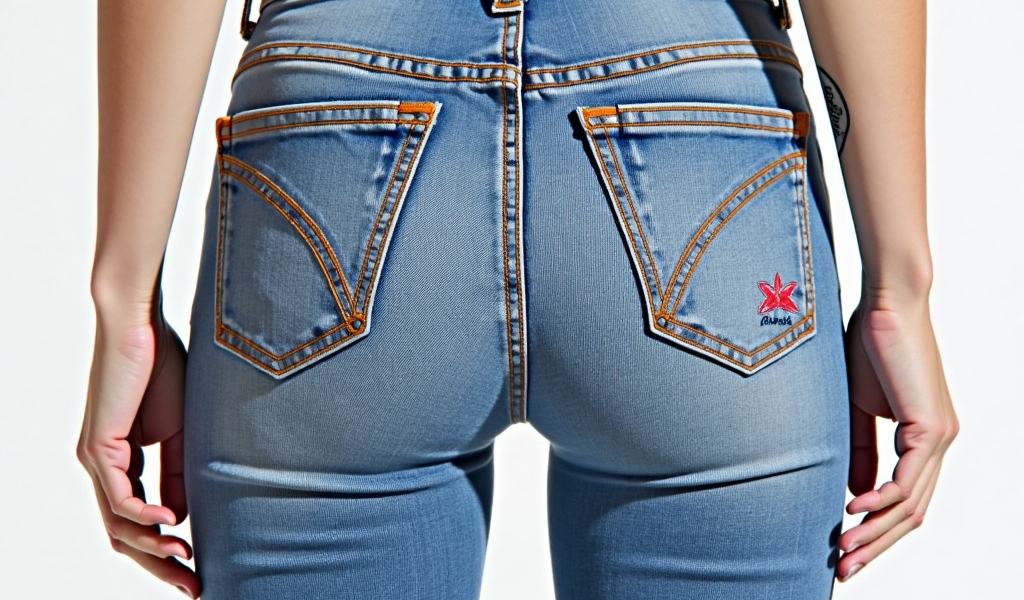
- Pockets: Back pockets are highly visible canvases. Front pockets offer smaller spaces.
- Hems: A subtle or bold border running along the bottom.
- Knee Area: Great for larger designs or patches, but consider wear and tear.
- Thighs: Offers a large space for statement pieces.
- Belt Loops: Small, fun accents.
- Seams: Stitching alongside seams for a subtle, outlined effect.
Important: Avoid areas with excessive stretch (like the inner thigh near the crotch gusset) as constant stretching can weaken or break stitches over time.
Sketching and Transferring
Once you have an idea, sketch it out on paper. Refine it, considering size and complexity relative to your chosen placement. Then, transfer it to your jeans:
- Water-Soluble Pens/Markers: Draw directly onto the denim. The ink will vanish with water later. Ensure it’s completely gone before washing normally.
- Air-Soluble Pens: Fade within a day or two. Useful if you plan to stitch quickly.
- Carbon Paper (Dressmaker’s Carbon): Place the carbon paper (colored side down) between your design paper and the denim. Trace over your design lines firmly with a stylus or ballpoint pen.
- Tissue Paper Method: Trace your design onto tissue paper, pin it over the denim, and stitch directly through both layers. Carefully tear away the tissue paper afterward.
Always test your transfer method on a scrap piece of denim or an inconspicuous area first!
Selecting Stitches
Different stitches create different effects. For denim embroidery, focus on sturdy stitches that can hold up to wear:
- Backstitch: Excellent for outlines and lettering. Strong and precise.
- Stem Stitch: Creates a smooth, slightly twisted line, perfect for curves and vines.
- Chain Stitch: Creates a linked line with texture. Good for borders and outlines.
- Satín Stitch: Used to fill small shapes with smooth, solid color. Requires careful tension on denim.
- French Knots: Adds beautiful texture and dots for flower centers or accents.
- Lazy Daisy: Creates simple flower petals or leaf shapes.
- Running Stitch: Simple dashed lines for subtle details.
Mix and match stitches for visual interest!
The Art of the Stitch: Techniques for Embroidering Denim
Now comes the hands-on part. Embroidering denim requires some specific techniques to ensure success:
Preparing the Fabric
Insert the area you’re embroidering into the hoop. Pull the denim taut – it should feel like a drumhead. This is crucial for even stitching and preventing distortion. If embroidering over a pocket, place a piece of sturdy cardboard or a plastic template inside the pocket to prevent stitching through both layers (unless that’s your intention!).
Threading and Knots
Cut a manageable length of thread (around 18-24 inches) to prevent tangling. Use a needle appropriate for your thread thickness. Start with a waste knot or anchor your thread with small anchoring stitches on the back. Avoid large knots on the back that might be uncomfortable against the skin.
Navigating Thickness and Seams
Denim can be tough. Use your thimble to push the needle through stubborn spots. When approaching thick seams, stitch *around* them rather than trying to pierce through multiple dense layers if possible. Go slowly, and don’t force the needle – reposition if needed. If using a sewing machine for patches, a denim needle is mandatory.
Stitching with Care
Maintain consistent tension on your thread. Too loose, and stitches will be sloppy; too tight, and you’ll pucker the denim. Take your time, especially with filling stitches like satin stitch. Periodically check the back of your work to ensure it’s neat and threads aren’t overly tangled.
Securing and Finishing
When finishing a thread or changing colors, run the needle under several existing stitches on the back of the work to secure it. Clip the thread close to the fabric. Once your embroidery is complete, remove any visible transfer marks according to the pen’s instructions (e.g., dab with water if water-soluble). Gently press the embroidered area from the wrong side using a pressing cloth to protect the stitches. Avoid excessive heat.
Caring for Your Embroidered Jeans: Preservation is Key
You’ve invested time and creativity into your jeans; proper care ensures your embroidery lasts.
- Washing: Turn your jeans inside out before washing. This protects the embroidery from abrasion against other clothes and the washing machine drum. Use a gentle cycle with cold water. Avoid harsh detergents or bleach, which can fade threads.
- Drying: Air drying is the gentlest option and helps prevent shrinkage or distortion that could affect the embroidery. If you must use a dryer, use the lowest heat setting and remove while still slightly damp, then air dry the rest of the way. High heat can damage threads.
- Storage: Fold your jeans carefully, avoiding sharp creases directly on the embroidered area. Hanging is fine, but ensure the embroidery isn’t stretched or strained.
- Repairs: Over time, stitches might loosen or break, especially in high-stress areas. Check your embroidery occasionally and mend any small issues promptly with matching thread to prevent further unraveling.
Treating your embroidered jeans with care will allow you to enjoy your unique creation for many years.
Beyond the Basics: Advanced Ideas and Inspiration
Once you’re comfortable with the fundamentals, explore more adventurous techniques:
Combining Techniques
Mix hand embroidery with other embellishments:
- Patches: Sew on pre-made patches (vintage, band, novelty) and then embroider *around* them to integrate them seamlessly into your design.
- Appliqué: Cut shapes from other fabrics, attach them to your jeans (using fusible web or basting stitches), and then outline or embellish them with embroidery stitches for texture and security.
- Beads and Sequins: Add sparkle and dimension by incorporating beads or sequins into your embroidery designs. Secure them firmly with backstitches or French knots.
Embracing Imperfection and Visible Mending
Embroidering over holes or tears isn’t just covering them up; it’s celebrating the life of the garment. Use bold stitches, contrasting threads, or creative fillings to turn damage into a design feature. This philosophy, known as visible mending, is both sustainable and stylish.
Large-Scale Projects
Feeling ambitious? Cover an entire leg panel with a sprawling floral design, a landscape scene, or intricate geometric patterns. This requires significant planning, time, and hoop repositioning, but the result is a true showstopper.
The Joy of Handmade: Conclusion
Embroidering your jeans is more than just a decorative craft; it’s a transformative act. It takes a ubiquitous item and infuses it with individuality, history, and personal meaning. It connects us to the slow, deliberate pace of handwork in a fast-paced world. It allows us to repair, reuse, and reimagine our clothing, contributing to a more sustainable relationship with fashion.
The process itself is rewarding – the focus required, the tactile sensation of fabric and thread, the visible progress with each stitch. And the result? A wearable piece of art that sparks conversations, draws compliments, and, most importantly, feels authentically *you*. There’s a unique satisfaction in wearing something you’ve personalized with your own hands.
So, gather your needles, choose your threads, find that pair of jeans waiting for a new story, and start stitching. Whether you begin with a simple backstitch monogram on a pocket or dive into a complex floral cascade down the leg, embrace the creative journey. Embroider your jeans, and in doing so, embroider a little piece of your own unique spirit into the fabric of everyday life. Your one-of-a-kind denim masterpiece awaits.