Breathe New Life into Your Wardrobe: DIY Crop Top Magic from an Old Shirt
The thrill of a new outfit is undeniable. But what if you could achieve that same rush of excitement without spending a dime, while also giving a forgotten garment a second chance? Enter the transformative power of the DIY crop top made from an old shirt. It’s more than just a craft project; it’s a statement of creativity, sustainability, and personal style. Whether you’re a seasoned sewing enthusiast or a total beginner armed only with scissors, turning an oversized tee, a button-down blouse, or even a worn-out band tee into a trendy crop top is surprisingly achievable. This guide will walk you through the process, offering tips, variations, and the inspiration you need to start your upcycling journey.
Why Upcycle? More Than Just a Fashion Statement
Before we dive into the scissors and stitches, let’s acknowledge the bigger picture. The fashion industry has a significant environmental footprint, contributing to vast amounts of waste and resource consumption. Choosing to upcycle an old shirt into a crop top is a small but impactful step towards a more sustainable wardrobe. Instead of discarding garments that no longer fit or suit your style, you’re actively reducing textile waste and extending the life of existing materials. It’s a direct challenge to the “fast fashion” cycle, promoting mindful consumption and resourcefulness. Plus, it allows you to express your unique style in a way that mass-produced items simply can’t match. Your DIY crop top will be one-of-a-kind, a true reflection of your personality.
Gearing Up: Essential Tools and Choosing Your Perfect Shirt
One of the best aspects of this project is its accessibility. You likely already have most, if not all, of the necessary tools lying around the house. Here’s what you’ll need:
- The Star Ingredient: An Old Shirt. Look in your closet, your partner’s drawer, or even a thrift store. Oversized t-shirts are ideal beginners’ fabric due to their stretch and forgiving nature. Button-down shirts offer a more structured look, perfect for a boxy or tied style. Jersey knits, flannels, or even lightweight sweaters can work wonders! Avoid shirts with significant stains or holes in areas you plan to keep, unless you’re intentionally going for a distressed look.
- Sharp Fabric Scissors: This is non-negotiable. Dull scissors will fray your fabric and make cutting frustrating. Invest in a decent pair dedicated to fabric.
- Measuring Tape or Ruler: For precision, especially if you’re marking a cutting line.
- Tailor’s Chalk, Washable Marker, or Soap Sliver: For marking your cutting lines on the fabric.
- Pins or Clips (Optional but Helpful): Useful for holding fabric layers together before sewing or securing folds.
- Sewing Machine or Needle and Thread (Optional): While many crop tops can be made with scissors alone, a sewing machine or hand-sewing allows for finishing raw edges, adding straps, or creating more complex designs for a polished look.
- Iron and Ironing Board (Recommended): Pressing your fabric before cutting and after sewing (if applicable) ensures neat results.
Selecting Your Shirt Canvas
Consider the final look you desire. An oversized graphic tee lends itself well to a simple, casual crop. A silky button-down can become an elegant, tied blouse crop. A striped shirt offers built-in visual interest. Pay attention to the shirt’s condition – minor flaws can often be incorporated or hidden. Most importantly, choose a shirt you feel excited about transforming!
The Transformation: Step-by-Step Guide to Your DIY Crop Top
Now for the fun part! While methods vary slightly depending on your chosen shirt and desired style, here’s a foundational guide suitable for most t-shirts and button-downs.
Method 1: The Simple Scissors-Only Crop (Perfect for Knits)
Method 2: Adding Structure and Polish (Involves Sewing)
This method is excellent for woven fabrics (like button-downs, flannels, or dress shirts) or if you want a cleaner finish on a knit.
Beyond Basic: Creative Variations to Elevate Your Crop
Once you’ve mastered the basic crop, the possibilities explode! Here are some ideas to personalize your creation:
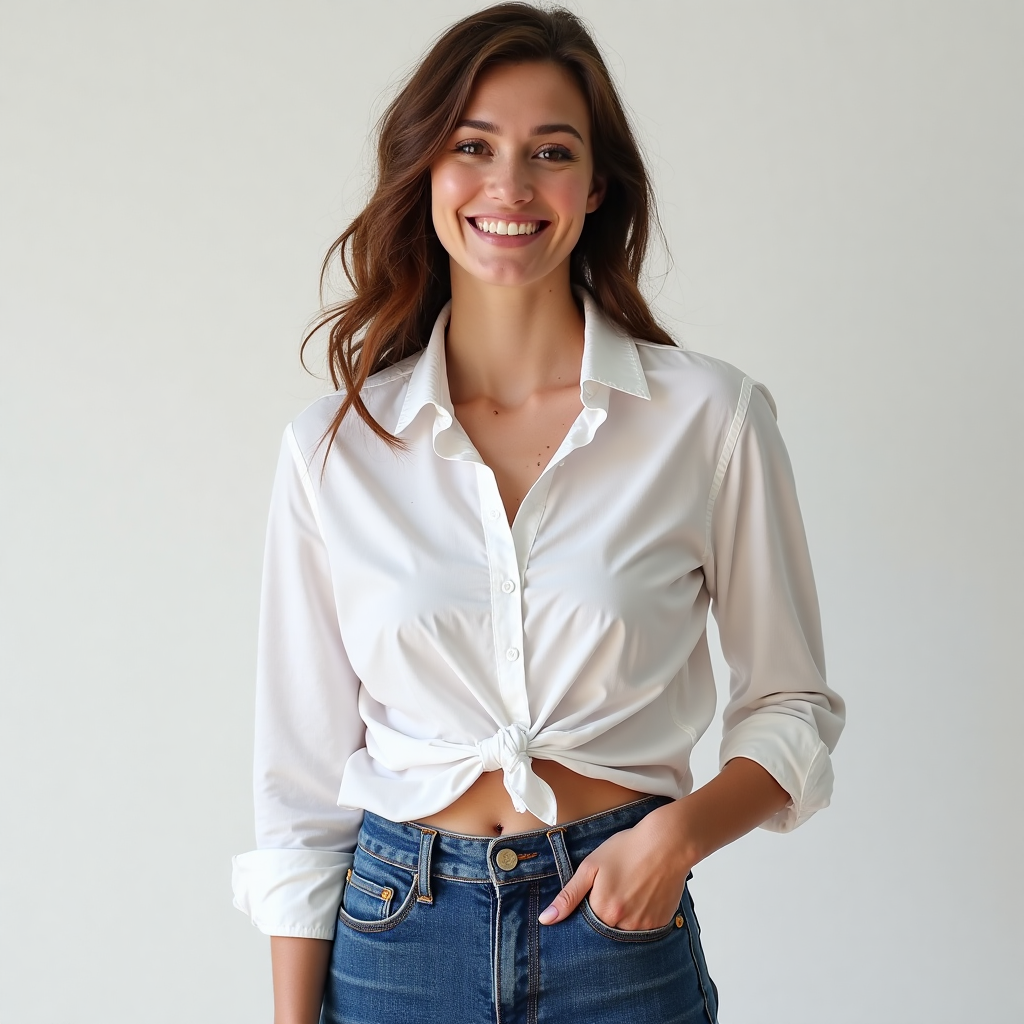
- The Knot Front: Before cutting the length, cut vertical strips (about 1-2 inches wide) up the front of the shirt, starting from the bottom hem and stopping well below the bust line. Tie these strips into knots for a playful, boho look.
- Off-Shoulder Charm: Cut a wider neckline, dropping it off one or both shoulders. You might need to add small straps or elastic for security. Finish the new neckline with a folded hem or bias tape.
- Back Interest: Cut a deep scoop back, a keyhole, or even criss-cross straps using fabric from the parts you cut off. Ensure straps are wide enough and securely attached.
- Sleeve Shortening or Removal: Crop the sleeves to cap, short, or flutter length. Or, carefully cut along the armhole seam to remove sleeves entirely for a tank style (finish the armholes with a hem or bias tape).
- Lace or Mesh Accents: Sew panels of lace or mesh onto the sides, back, or front for a touch of femininity or edge.
- Distressing: Use fine-grit sandpaper or a razor blade to gently distress the hem or specific areas for a worn-in vibe.
Styling Your Unique Creation
Your DIY crop top is a versatile piece ready to integrate into your wardrobe. Here’s how to show it off:
- High-Waisted Bottoms are Key: Pair your crop top with high-waisted jeans, trousers, skirts, or shorts. This balances the exposure and creates a flattering silhouette.
- Layer Up: Throw on a blazer, denim jacket, cardigan, or oversized flannel over your crop top for cooler days or a more polished look.
- Accessorize: Statement jewelry, belts cinched over high-waisted bottoms, and hats can elevate your outfit.
- Footwear: Dress it up with heels or ankle boots, or keep it casual with sneakers or sandals.
- Confidence: The most important accessory? Wear it with pride! You made this!
Conclusion: Embrace the DIY Spirit
Creating a DIY crop top from an old shirt is far more than just a weekend project. It’s an empowering act of creativity that challenges disposable fashion norms. You take control of your style, breathe new life into neglected garments, and reduce your environmental impact – all while ending up with a unique piece that no one else owns. The process itself is rewarding, teaching valuable skills and fostering a sense of accomplishment. So, raid those closets, grab your scissors, and get ready to transform. Don’t be afraid to experiment, make mistakes (they’re often happy accidents!), and most importantly, have fun expressing yourself through sustainable style. Your perfect, personalized crop top awaits!